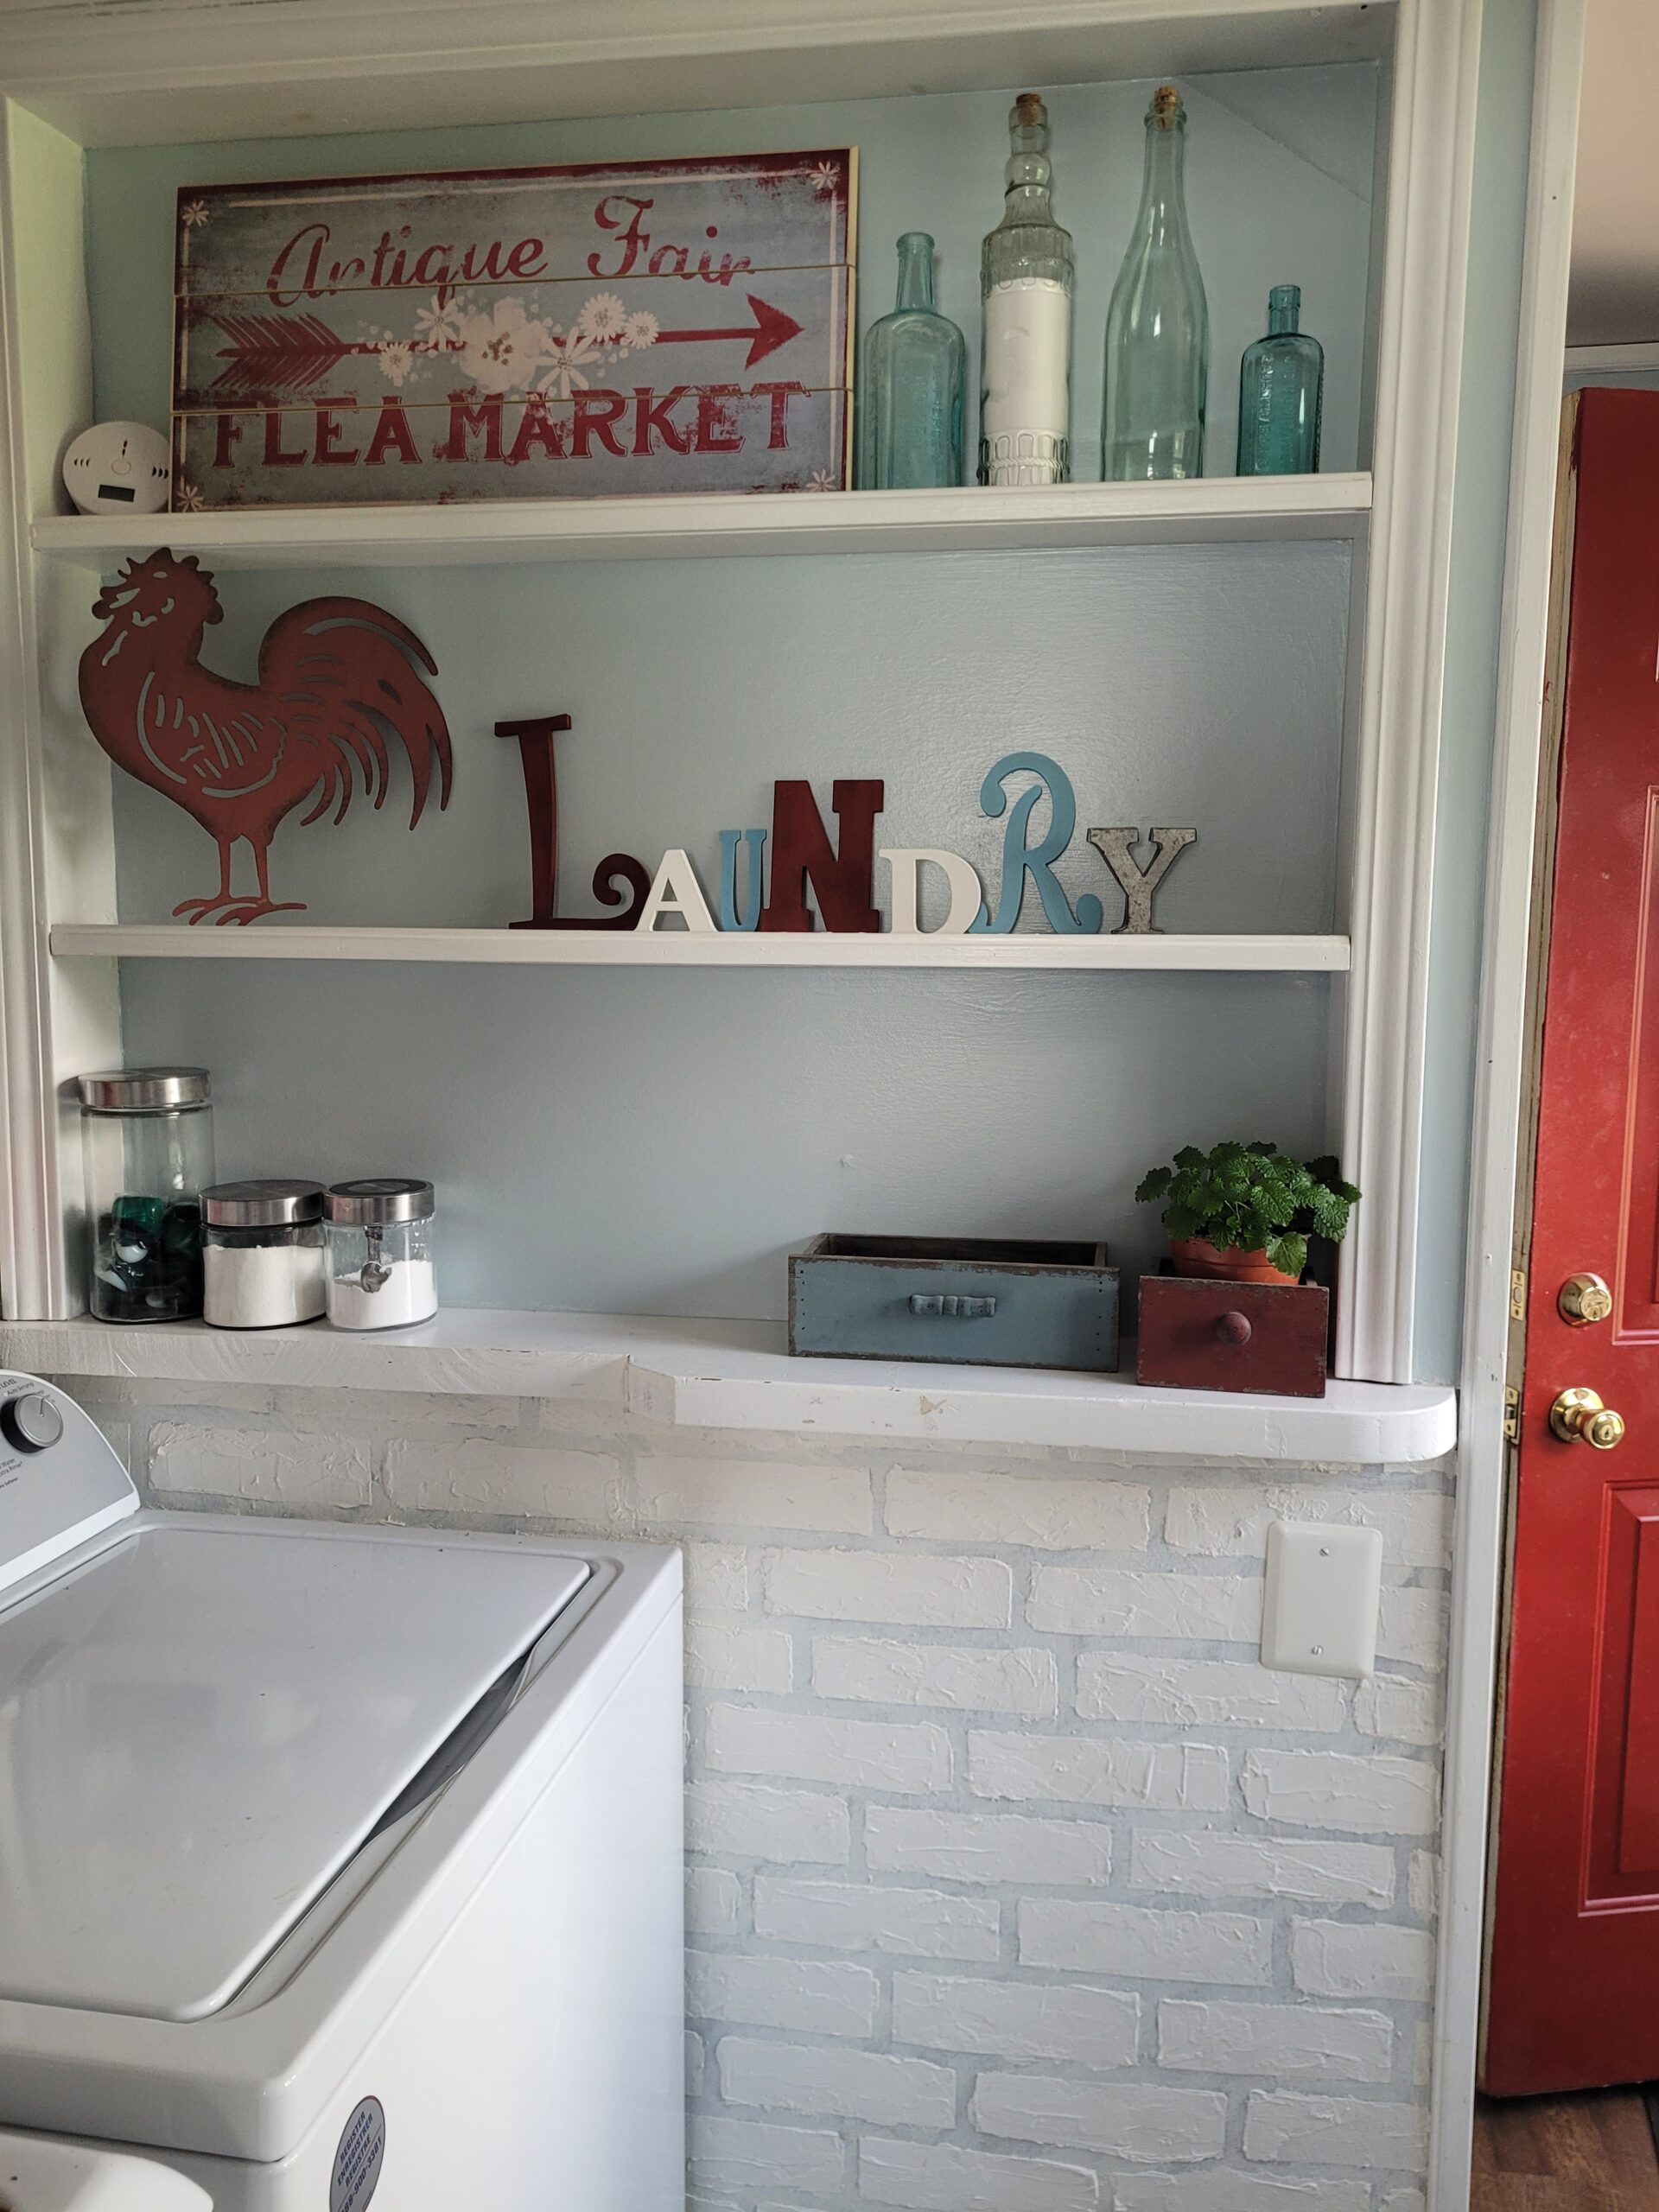
I bought my current home from the bank in 2018. The former owner had passed away after a long, debilitating illness. To say that the house was in rough shape is an understatement. Every inch of the house (and yard) needed renovation to make it inhabitable. I had all of the windows replaced, gutted the kitchen and bathroom, new flooring, replaced all of the doors, vinyl siding, gutters and downspouts, new electrical, new plumbing, primed and painted EVERYTHING and then when I thought I was almost done – I discovered I needed a new furnace. Needless to say, I was running out of money. I hired people to complete the big projects but I did as much as possible myself. There was a wall in the laundry area that was not drywalled. It was just a large piece of wood, not decorative wood, it was like thin plywood. There was also a large blue X on the wall, drawn with chalk. No idea why. This wall is visible from my kitchen so I wanted to make the wall look nice, but I knew I wouldn’t be able to just paint over the wood. I love the look of brick accent walls, but at this point, brick was not at all in my budget. So I figured out how to get a look similar to brick – but much cheaper. Heres what I did.
Supplies:
-Paint (choose the color that you want for the “mortor” between the bricks) I used grey.
-Cheap paint brush (I threw it away after the project because of the sand in the paint)
– sand (I mixed this in the paint for texture) (I took sand from my grandsons sandbox)
– Pre mixed joint compound (white)
– electrical tape (If I did this project again, I would find a thinner tape)
– putty knife (that will fit into the joint compound container)
– yardstick and pencil
What I did:
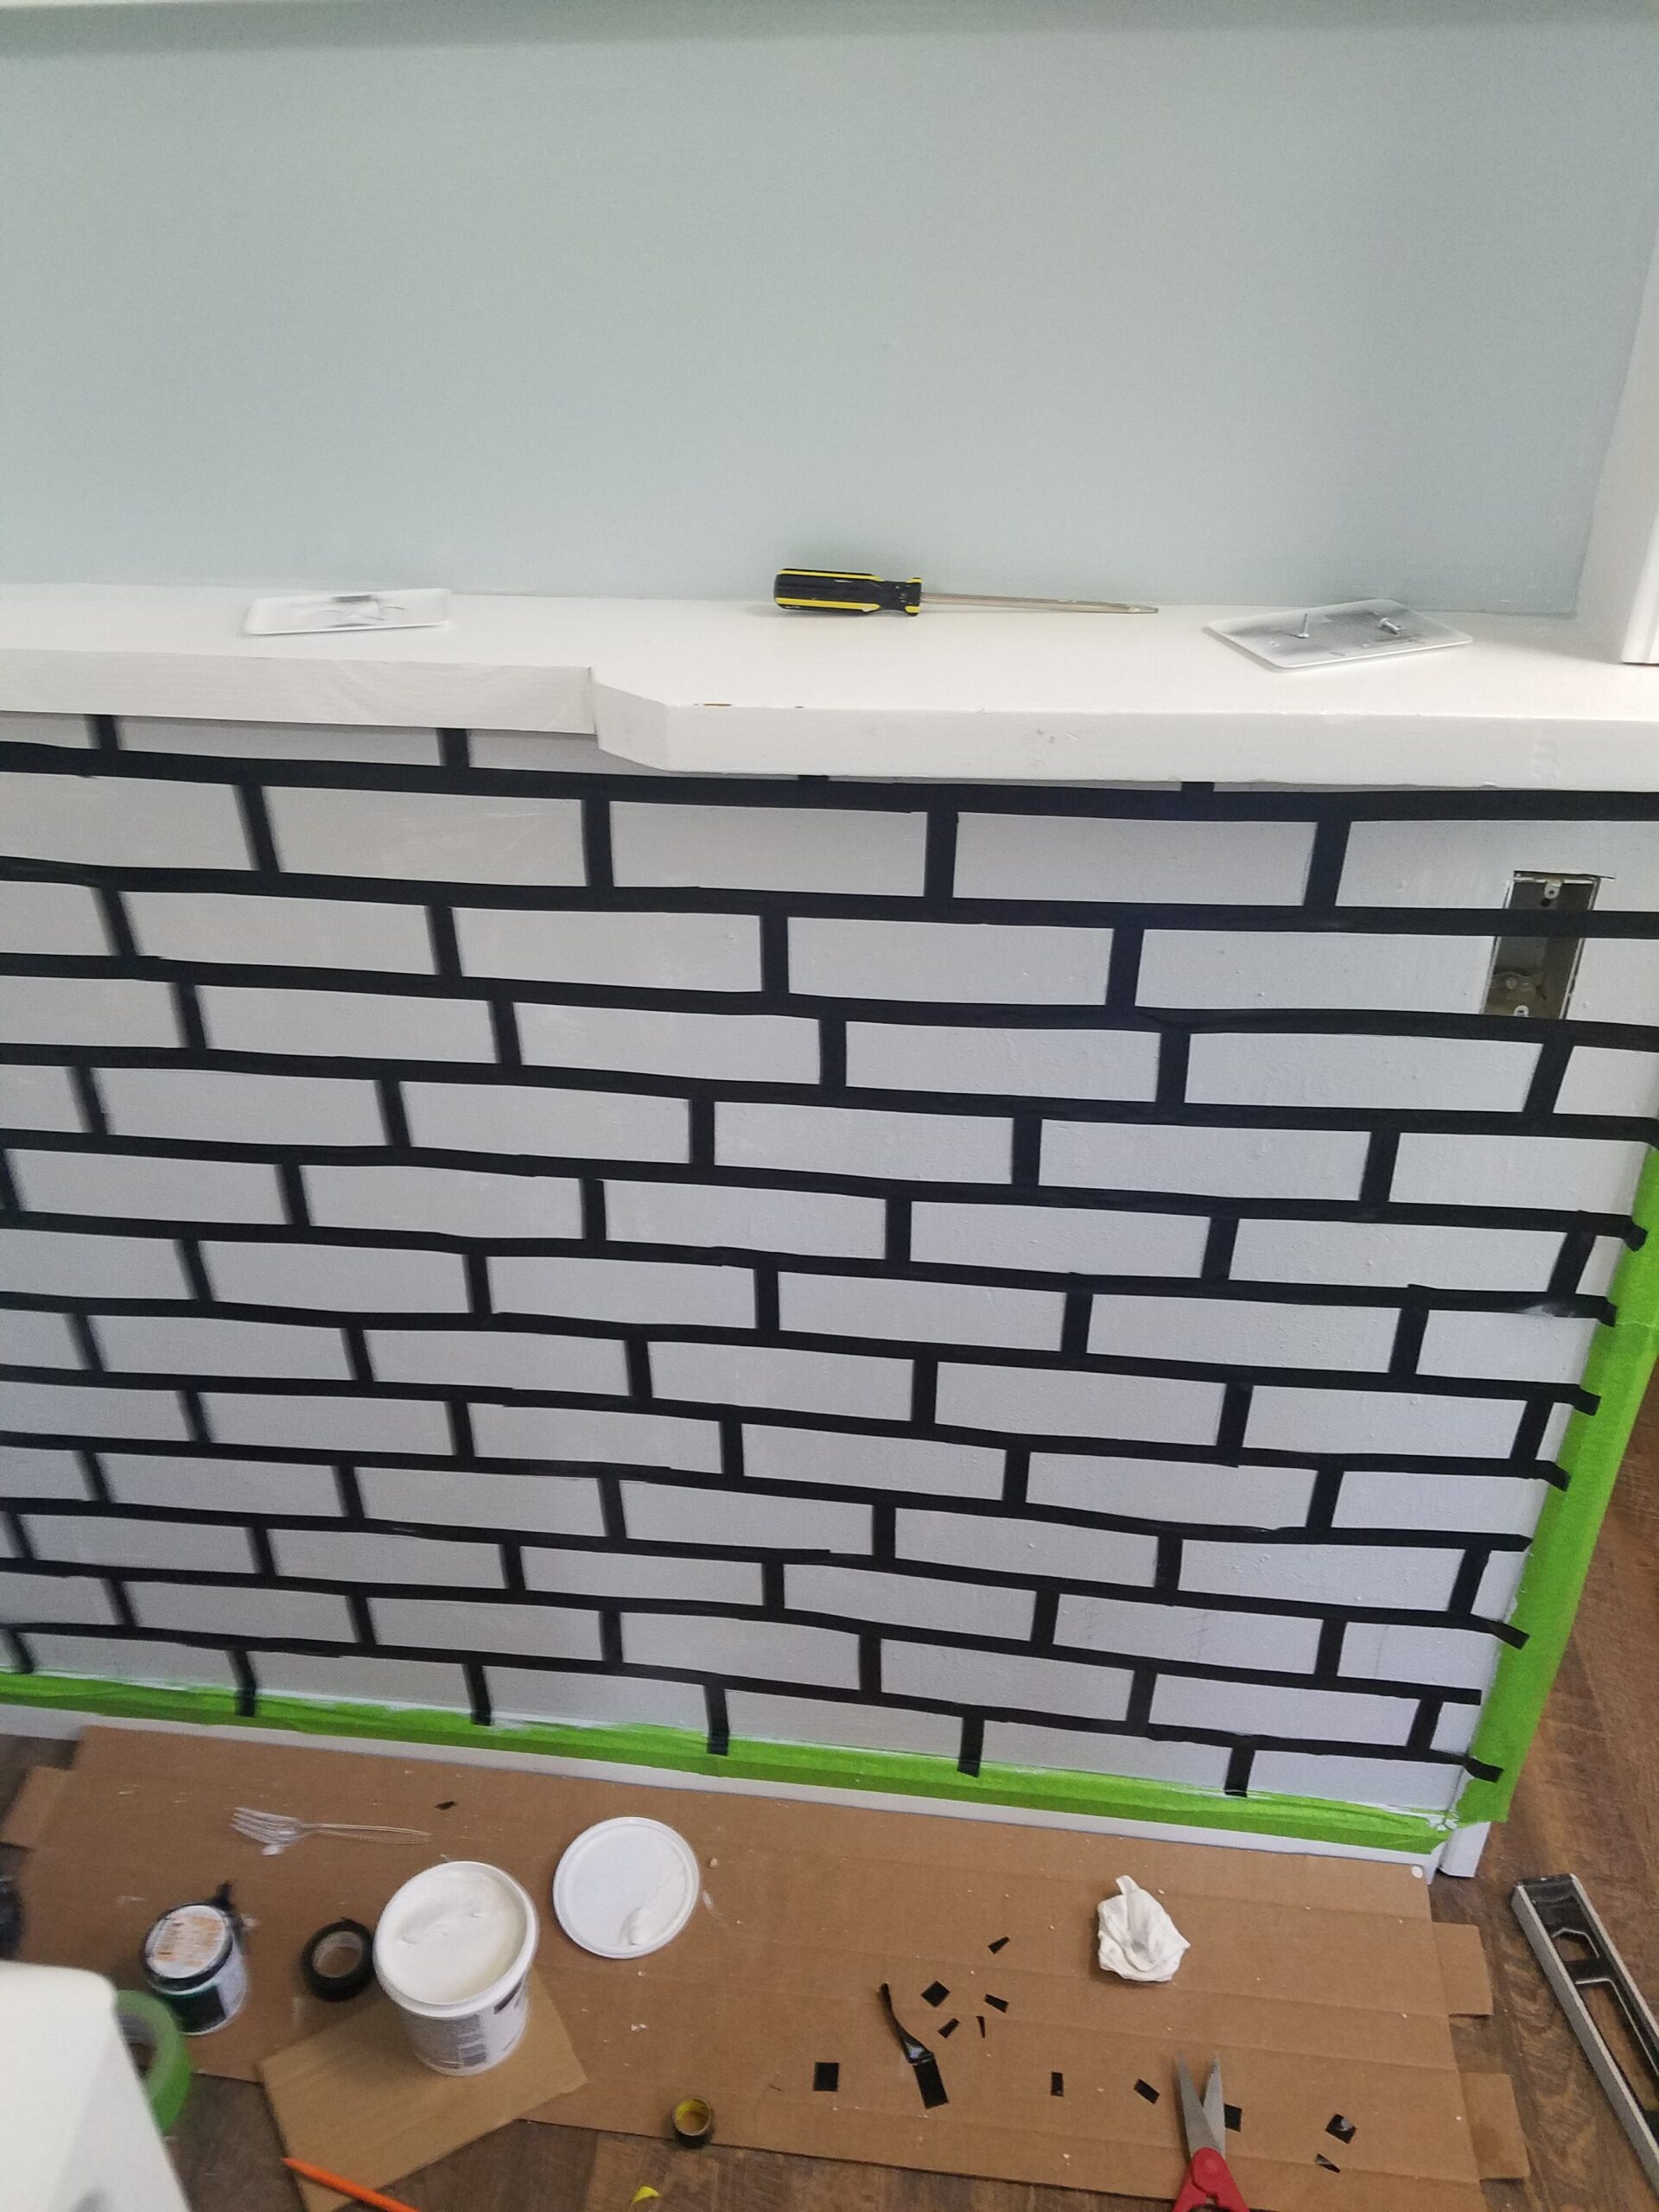
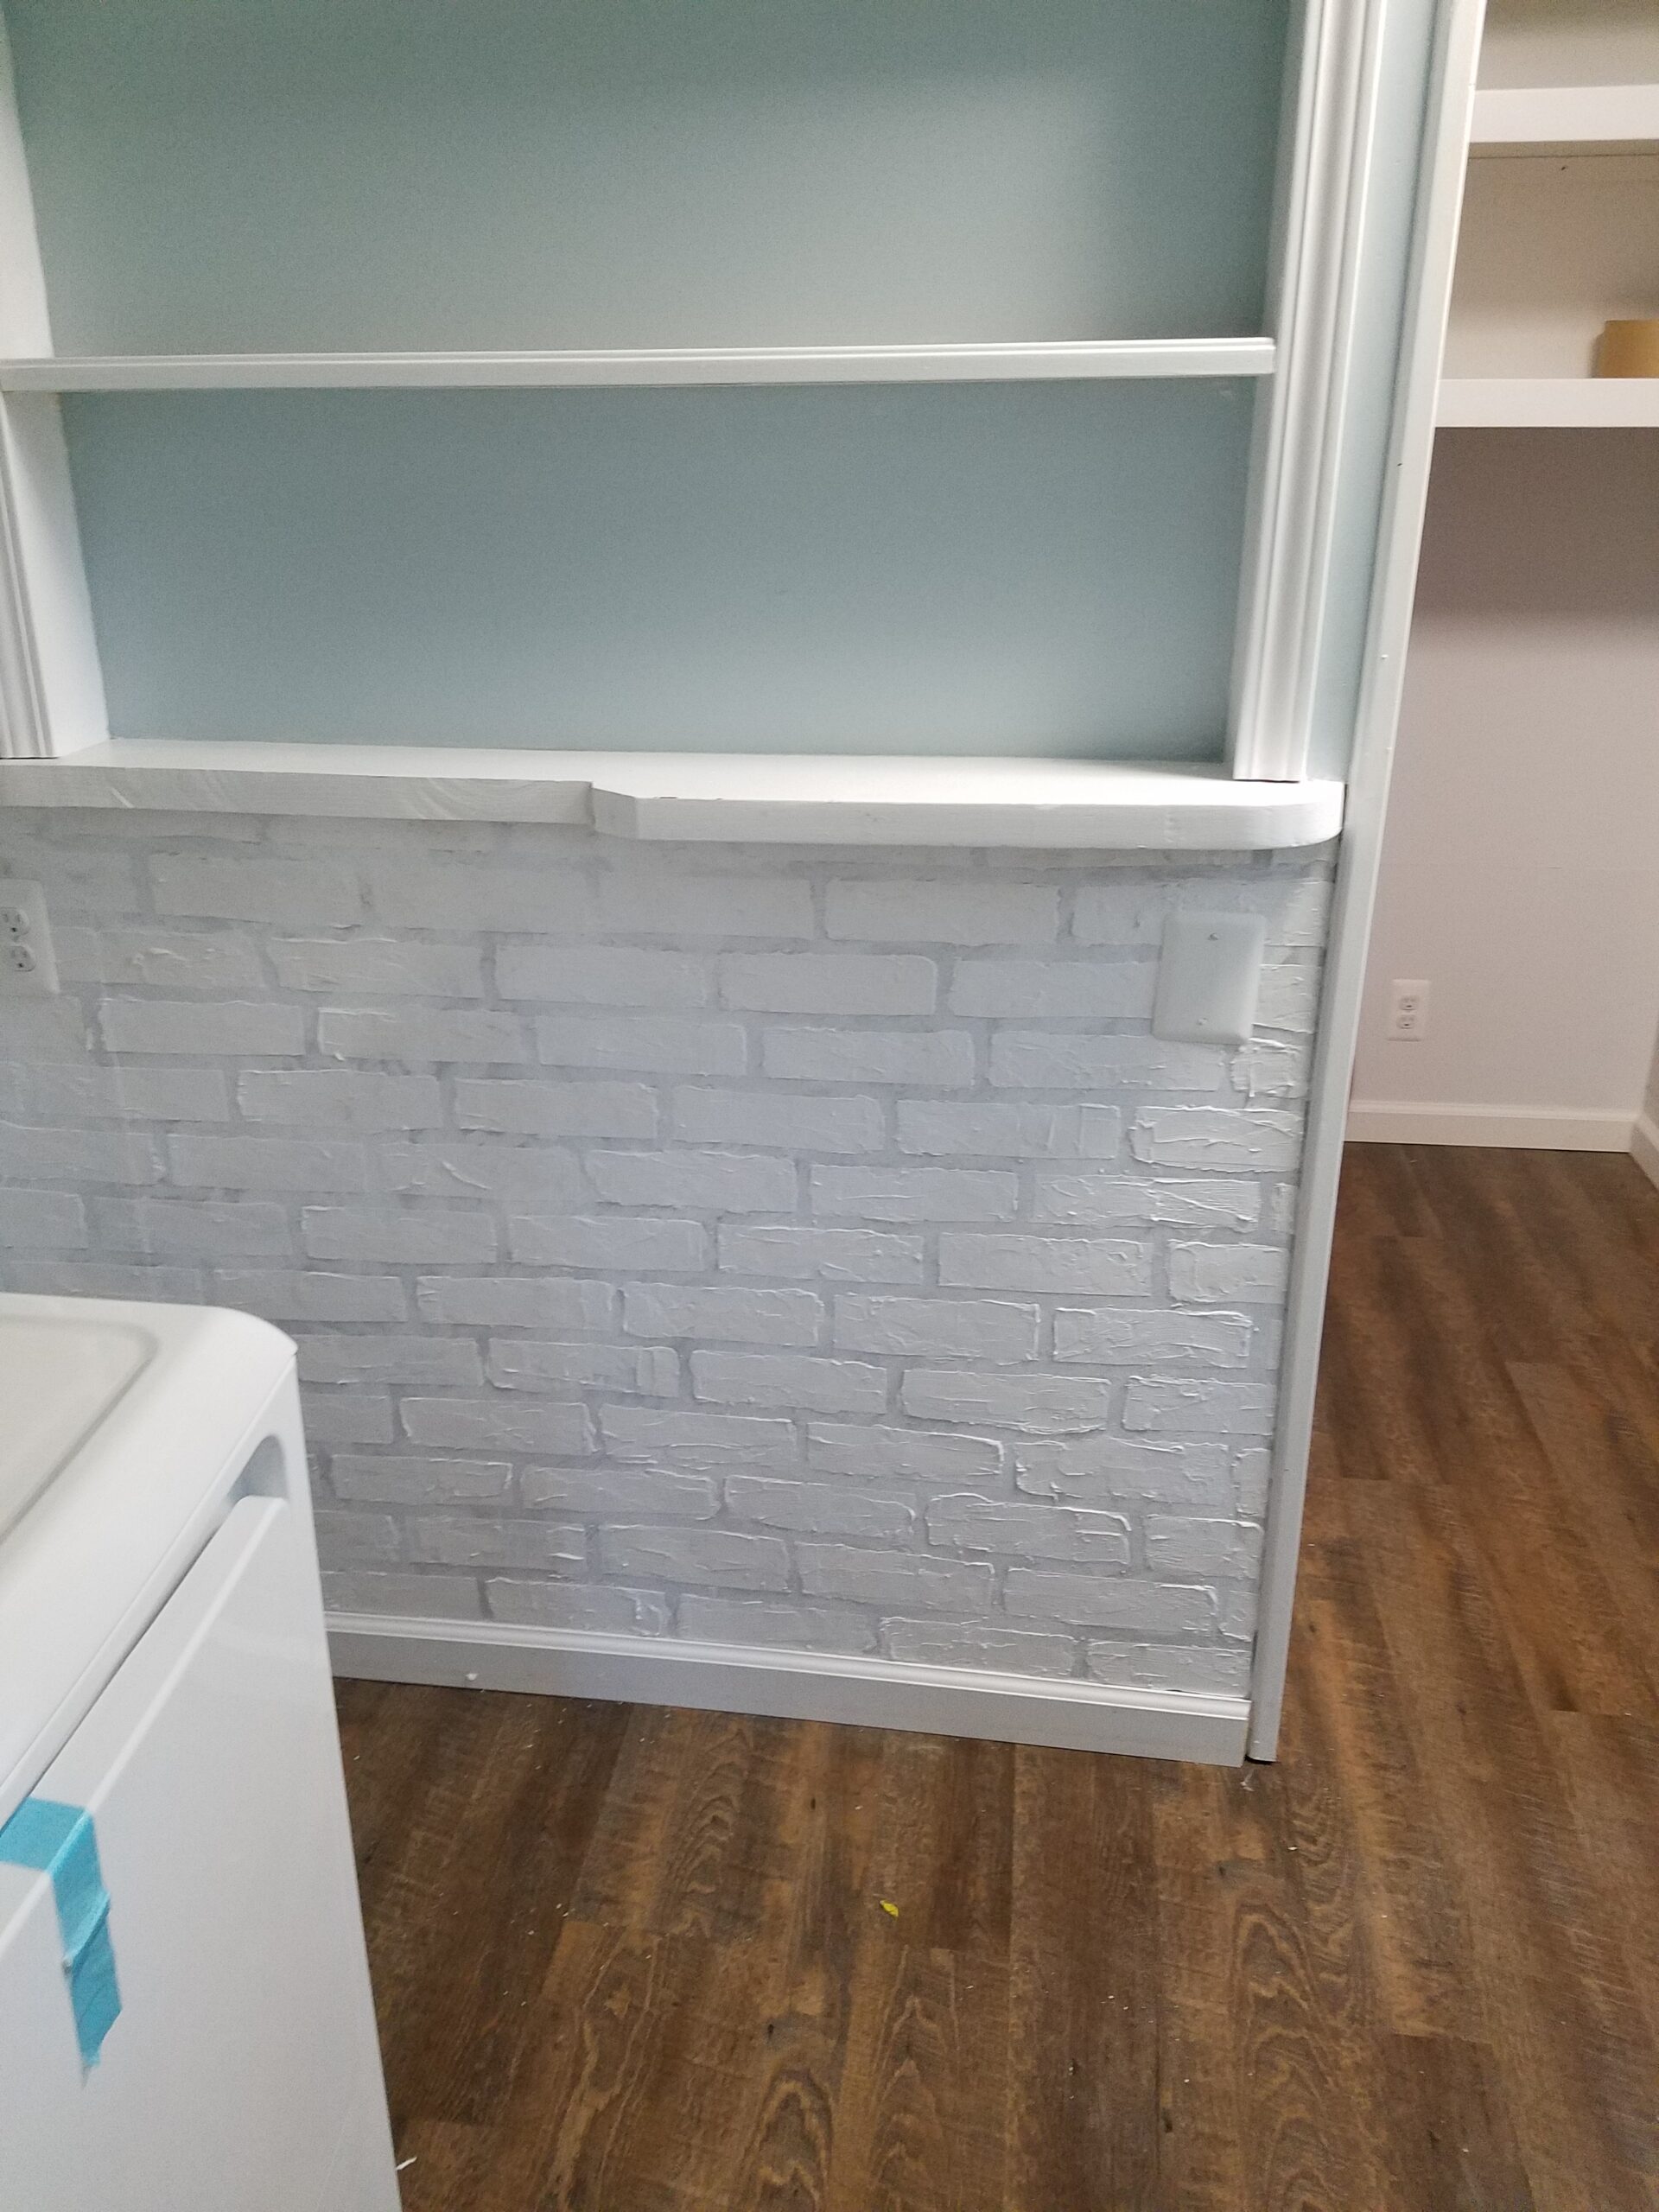
I mixed the desired amount of paint and sand together (this will vary depending on the size of your project). You want the paint to have texture, but if you add too much sand, the paint will not stick to the wall. I applied the paint with a paint brush and let it dry COMPLETELY. Its very important that its fully dry because you will be applying tape to it. Using a yardstick I made horizontal lines approximately 3 inches apart, starting from the bottom of the wall. You can adjust the width of the lines to the size of “brick” that you desire. I wanted my bricks approximately 2.5 inches wide with a ½ inch space in between. Apply electrical tape to the horizontal lines. As I mentioned above, if I were to do this project again I would use a thinner tape. Then apply the tape VERTICALLY to make the brick shape. I placed the tape vertically every 8 inches. Make sure the tape is adhered well to the wall and then apply the joint compound with the putty knife. You WANT imperfections with this step. Let set 10-15 minutes and then remove the tape. After the tape is removed you will want to apply another layer of compound in random areas on the bricks to achieve a less uniform look to the mortor lines and vary the thickness of the bricks.
Im very happy with the way this project turned out. This is a big impact, small budget kind of project. I had the paint, electrical tape and sand so this cost me less than $12 to complete.

I love my little house (864 square feet). It feels more like home than any house I have ever lived in, probably because I have been so involved in the renovation process. If you would like to see more before and after pictures of my little house, send me a message or email. If you try this project, let me know how it turned out or any things that you did differently.